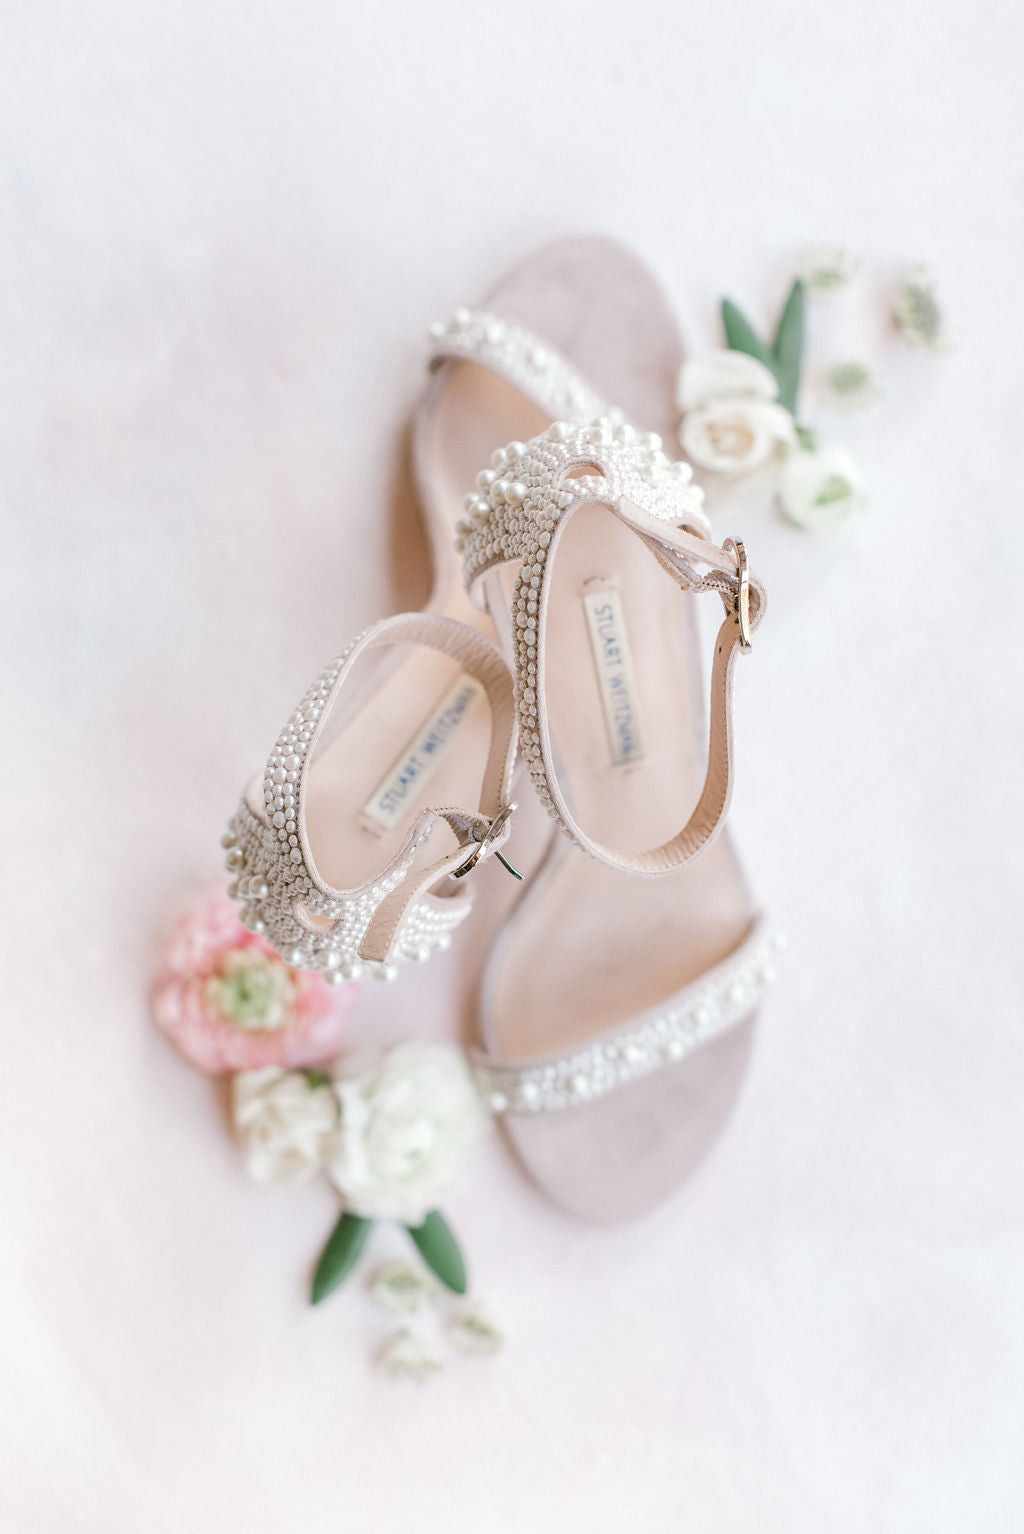
Wedding Shoes- How To Take Care of Your Feet
After walking miles alongside hundreds of bridal shoes as a stylist in the wedding world, we knew it was time to dish on some of the tricks that can make or break your wedding day foot comfort.
Nothing can ruin your evening faster than blisters or uncomfortable shoes, so we feel it's our duty to share the details on how to best avoid missing even a moment on the dance floor!
It all starts with breaking in your shoes the RIGHT way.
There is an art to properly breaking in your bridal heels. The most important thing to keep in mind is that your photographer will be taking detail shots showcasing your shoes. Follow these steps for properly breaking in your shoes and keeping them looking like new!
Breaking In Your Wedding Shoes
Step 1:
Always break your shoes in on a carpeted surface so you keep the integrity of the sole for pictures. If you have anti-chafe balm, you can put a thin layer on your heel and anywhere else you feel pressure, to reduce the chances of friction or blisters during the break-in process. And of course, don't forget it on the day of your wedding!
Step 2:
If you can, wear nylon peds so you don't sweat or get the insides of the shoes dirty while you're breaking them in. You can find these in our Event Kit for the gents, The Groom Kit. Go ahead and borrow them....they are meant for multiple uses! You can also pull a thin insole out of another shoe you might have or use parchment paper to line the inside of your shoe. We know, it sounds bizarre, but trust us - it works!
Step 3:
Continue to store your shoes in their original box (dust bags if possible) and repeat steps 1 & 2 as often as you can until shoes are broken in. (If you have purchased The Bride Kit we have included a dust bag for you!)
*Note that if you have a cobbler you trust, you can always take them there to have them stretched or adjusted in any way possible. Just make sure they keep them really clean for you!
After you've broken in your shoes - which we hope will help prevent some of the potential pain from your Pradas - hopefully they are comfortable enough to dance the night away. If you are still struggling with the perfect fit, you can give the following styling tools a try!
(Note: we encourage sharing your tools with your entire bridal party, as often times the men can suffer just as much as the women with stiff new footwear.)
Foot Gel Pads
Foot gel pads are a great way to add extra comfort for those long hours in the same pair of shoes. They can be a lifesaver if you are not used to wearing heels, if your heel height is higher than you are used to, or if your shoes are just a little too big. They also create a little lift if your shoes have a high pitch (arch), giving you more of a platform feel.
They are easily transferable and washable as well. Most likely between all of your wedding events you will be switching between different styles of shoes. These are a great, reusable tool that you can slip into just about any pair of shoes to save your feet for your big day. If you aren't needing them, hand them off to a bridesmaid who brought brand new stilettos and is worried about new shoe pain. You can clean them on the fly with the alcohol wipes found in your kit if they need a quick refresh.
Blister and Chafe Balm
Body Glide was originally designed for triathletes to prevent chafing during the lengthy swim, bike, and run. We've adopted it for weddings, which we've decided can go head to head with any triathlon as an endurance sport! This balm creates a thin, mess-free barrier between your skin and any irritant, so it is best used proactively. It's not only imperative for heels but can also prevent rubbing around the armpits, inner thighs, or anywhere chafing on the body occurs!
Moleskin and Bandaids
Moleskin is typically used in the medical profession to keep the rough material of casts and splints from chafing the skin. It's best used preventatively, so if you put your shoes on and you notice a scratchy spot that is irritating the skin, don't wait. Get that moleskin on your shoe as quickly as you can! Always apply the sticky side to the shoe so the soft part is touching your skin. You can find sheets or squares at most pharmacies that can be trimmed with small scissors (found in the sewing kit) as needed, so you can apply to any areas that may need protection.
If you are waiting to apply the moleskin until after your detail shots are complete, go ahead and trim to the size you need, but don't peel the backing off. Put the trimmed piece in a baggie and keep it close by. You can have a bridesmaid or family member help you apply the moleskin when the photographer is done.
If you use the anti-chafe balm and moleskin, and properly break in your wedding day shoes, you should be good to go for the big day. But just in case, we recommend picking up some clear, thin bandaids. Even if you don't need them, a bridesmaid or groomsman might!
Rescue Tape
One of our favorite wedding day hacks for shoes with embellishments is to put a strip of Rescue Tape over anything that might be catching on the hem of your bridal gown. While this might not be a way to decrease foot pain, it will definitely help keep you walking freely down the aisle!
Wearing shoes with ribbons or laces that extend up the ankle? Another fantastic use of Rescue Tape is to help secure the ties in place so they don't slip down as you are walking!
One of the sweetest traditions we have seen is the bride and groom leaving sweet messages on the soles of their soon-to-be spouse's wedding shoes. Be sure to communicate with your photographer about whether or not you want those detail shots to include a before and after!
Hopefully these tips keep your feet happy, healthy, and ready to dance the night away.
We have so much more to share when it comes to preventing and solving wedding day discomfort or disasters. CLICK HERE to sign up for our FREE E-BOOK and learn all our styling secrets!
xo,
Risa + Jess
photography: Marisa Belle Photography
Written by Jessica Zeldner
